Sun, Feb 7, 2021 10:00 AM
Alright full disclosure here, I knew nothing about knots, so Chelsey explained to me I should start with the bowline. The bowline is also known as the king of knots due to its versatility. We figured this would be a good knot to start with as it can be used to tow larger objects, help pull people, is easy to tie, and it is easy to untie. Luckily for me, Chelsey had attended sailing camp and was an avid sailor in her youth, so she knows how to tie a multitude of knots.

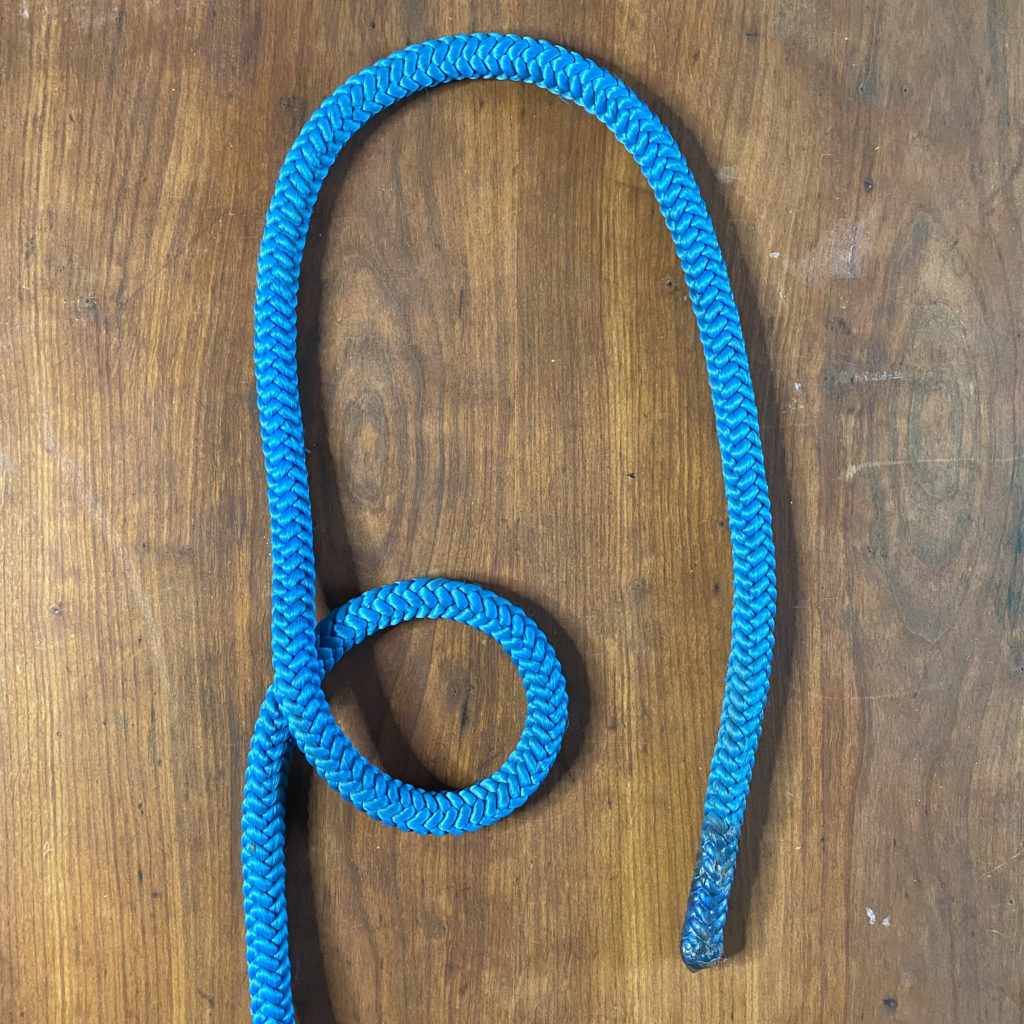
The top of the picture is what you would be tying around/to. We will wrap the rope around said item, and create a loop with the part coming back towards you is underneath. Make sure to have enough length to tie a knot.

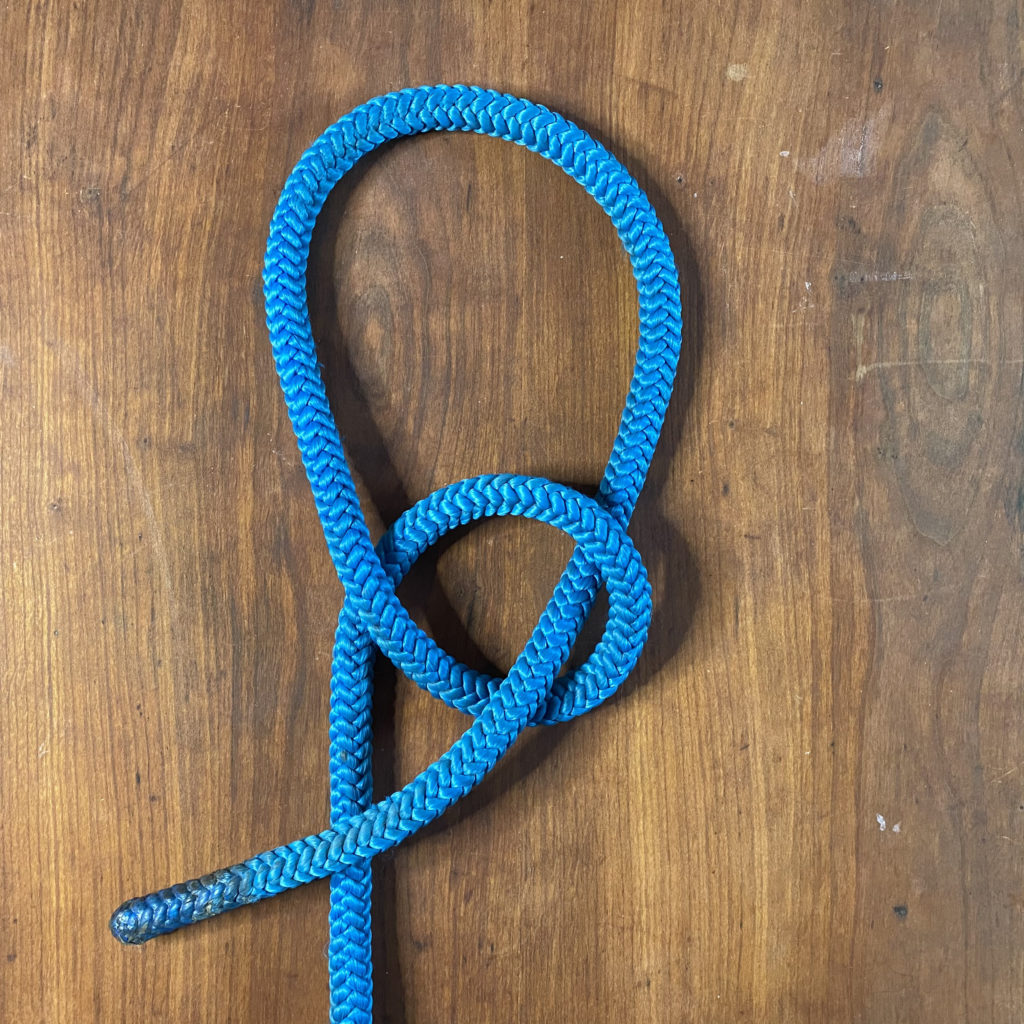
Insert the length through the loop we created in step one.

Now that the length is through the loop you will need to wrap it around the rope.

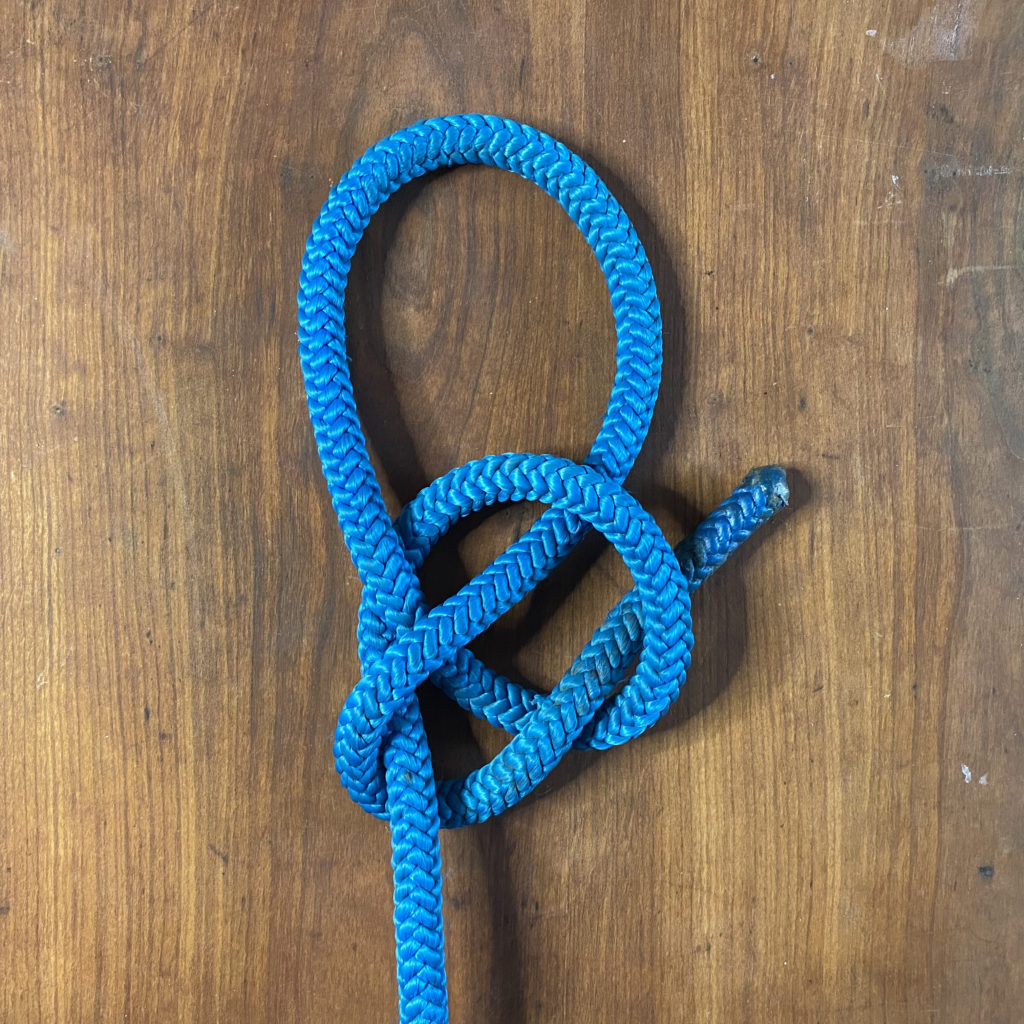
Bring the length back through the loop.

Pull the length and the rope tight. You now have a bowline knot. The more you pull/add tension the tighter the knot becomes. This is what makes it such a nice and versatile knot. Be warned though that part of the reason it is such a nice knot is that it can be easily untied. This is true if there is little or no tension and it is being vibrated or shaken.